How to Replace an Excavator Front Idler Without Getting Stuck Under the Track Frame
Component selection, fitment and the connections that keep an undercarriage working as a system.
On this page
An excavator front idler sits inside the track frame with a recoil spring pushing against it, which means the part you can see from outside is only half the job. When the idler starts leaking, flat-spotting, or wobbling, the machine usually still travels well enough to keep working, so the temptation is to treat the swap like any other bolt-off job. The excavator that comes back from that kind of repair often drifts sideways, throws the track, or leaks again within weeks. Replacing an excavator front idler correctly means working with the tension system instead of against it: supporting the machine, releasing track adjuster pressure through the correct grease point, and checking the recoil housing before the new part goes in. That sequence is what separates a one-day repair from a recurring one.
Last updated:

Know When a Front Idler Needs Replacement
Replace the front idler when it leaks oil, develops a flat spot or out-of-round tread, shows deep grooves, wobbles on its shaft, or loses flange height. These are wear signals that the idler can no longer guide the chain cleanly around the front of the track frame.
The visible symptom is not always the full story, and the same symptom can point to different causes depending on what surrounds the idler.
| Symptom | Likely cause | First check |
| Oil around the idler seal | Worn seal, damaged bushing, or over-tensioned track | Seal area and measured track sag |
| Flat spot or out-of-round tread | Seized roller, packed debris, or chain dragging | Rotate rollers with the track unloaded; clean the frame |
| Wobble or excessive side play | Worn yoke bore or guide rails | Measure yoke clearance and slide rail wear |
| Deep groove on the tread | Abrasive material or chain-rail contact | Inspect chain rails and debris packing |
| Track wanders or derails | Tension, chain, sprocket, or alignment issue | Verify sag and full undercarriage alignment |
Visual wear alone is not enough to establish serviceability. Compare the component with the limits and inspection method in the OEM service information, and record the machine make, model, serial number, track shoe configuration, and idler position before ordering. The same model family can use different undercarriage components across production ranges.
How the Front Idler Works Inside the Track Frame
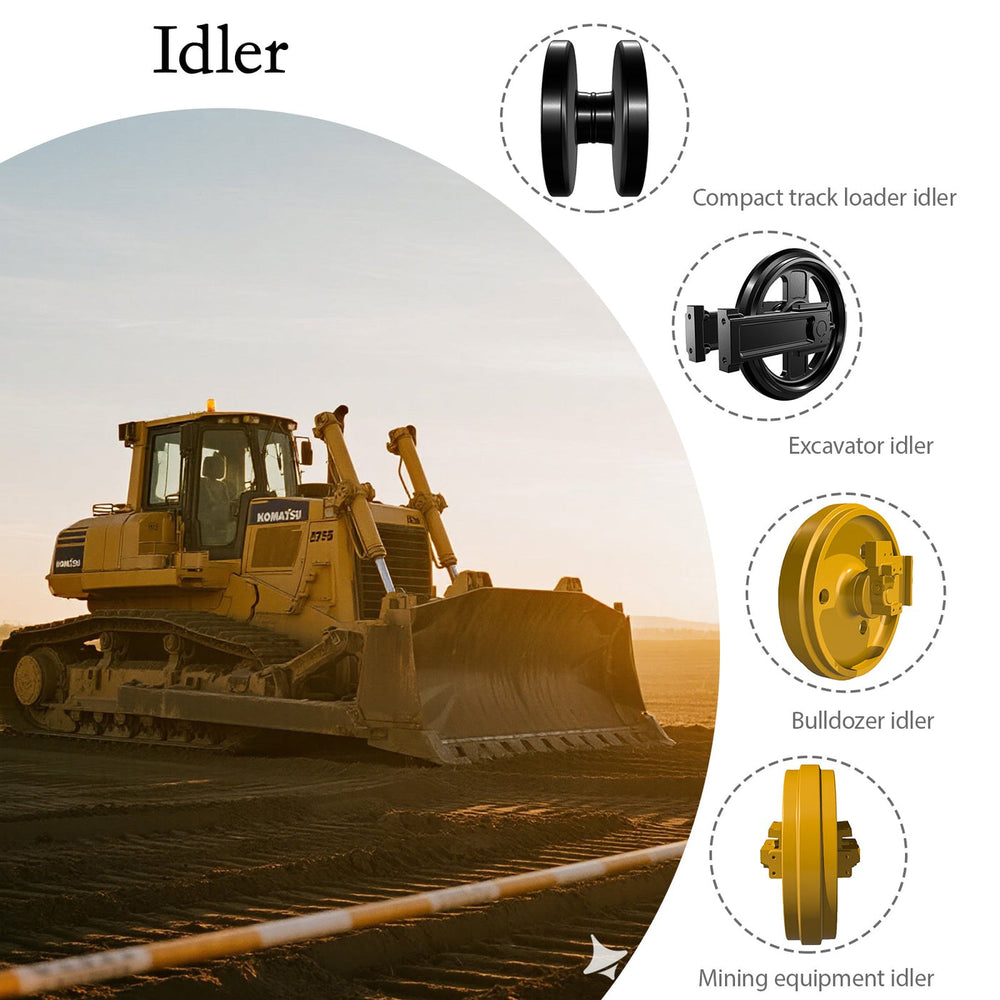
The front idler does not bolt to the frame the way a bottom roller does. It rides on a yoke that slides inside the track frame rails, with a recoil spring and an adjuster cylinder holding the assembly forward. That spring-loaded position keeps the chain tight around the front of the machine and absorbs the impact of travel.
This design explains why replacement differs from a roller swap. The idler is under constant spring force, so it cannot be unbolted while the track is tensioned. The adjuster cylinder is filled with grease at high pressure, and the recoil spring can move the whole assembly the moment pressure drops. On a Cat 320 or 330, the yoke and guide arrangement differs from a Komatsu PC200 or PC300, and the bolt patterns and adjuster access points are not interchangeable. The service manual for the exact serial range decides how the housing is opened, not the general procedure found online.
Pre-Replacement Checklist and Tools
Work through this checklist before lifting the machine so the repair runs in one session instead of several:
Machine make, model, serial number, and track configuration recorded
Current OEM service manual for that serial range available on site
Replacement idler and hardware compared against the old unit before the job starts
Photos taken of the old part, mounting area, and adjacent components
Rated lifting equipment and mechanical stands confirmed for the machine weight
Level, firm work area, clear of personnel and blocked off
Tool-wise, you need the service manual, a grease gun with clean grease, correct sockets, a breaker bar, a calibrated torque wrench, approved slide or pry tools, cleaning supplies, and PPE. Park on firm, level ground, shut down the engine, remove the key, and engage the hydraulic safety lock. Rated mechanical support carries the machine while you work; hydraulics are for lifting and positioning, never for holding the undercarriage.
Release Track Tension Safely
Track tension must be reduced through the adjuster's grease relief point before the idler assembly can be touched, and this step carries serious injury risk.
The grease inside the adjuster cylinder is under high pressure. If the relief valve is opened carelessly, high-pressure grease can discharge and inject into skin or eyes, and the idler can retract as the recoil spring unloads. Never stand directly in front of the relief point, never remove the fitting completely, and release pressure in small, controlled turns. Keep other people away from the front of the track and follow the relief procedure in the current OEM manual for the machine.
A track that still feels tight after several turns of the valve may be loaded by packed debris, a binding idler, or an uneven machine position. Do not force the chain or pry against the frame until you verify whether pressure is fully relieved. Once the adjuster is slack, the recoil spring may assist the rearward movement of the yoke, after which the idler can typically be prepared for removal from the housing per the manual.
Remove, Inspect, and Install the Front Idler
Once tension is released and the machine is mechanically supported, the idler can be removed in a controlled sequence. Access varies between machines, so treat these as the working pattern rather than a universal recipe.
Clean packed mud and debris from the front of the track frame.
Remove guards, guide plates, and shims only as required by the service manual.
Support the idler and yoke with lifting equipment before removing final hardware.
Slide or lift the assembly out of the housing without prying against the frame rails.
Inspect the recoil spring, yoke, wear strips, slide rails, and adjuster rod before any new part is fitted.
Clean the housing and all mating surfaces, removing rust scale and packed material.
Compare the new idler with the old unit for diameter, flange configuration, bore, width, and bolt pattern.
Position the idler and yoke squarely, install hardware by hand, then tighten in the OEM sequence to the OEM torque.
If the holes do not line up naturally, stop. A misaligned yoke forced into place with bolts can damage the frame rails and guarantee uneven chain contact. Some Cat models use through-bolts with locknuts; some Komatsu configurations use caps and shims. The manual for the serial range settles which hardware belongs there and how much clearance the flanges need.
Replace the Idler Alone or the Whole Recoil Assembly?
Replace only the idler when the yoke, recoil spring, wear strips, and frame rails are within specification. Replace the assembly when any of those parts shows damage, because a new idler riding in worn guides will generally fail prematurely.
| Option | When it makes sense | What it changes |
| Idler only | Leak or tread wear, everything else measures within spec | Lowest parts cost, keeps the existing recoil setting |
| Idler with yoke and wear strips | Yoke worn or distorted, slides scored, idler cannot sit true | One removal cycle, restores the mounting geometry |
| Full front assembly | Recoil spring sagged, adjuster leaking, frame rail wear visible | Highest cost, but addresses the whole load path |
The decision should come from measurement, not from how old the parts look. A sagged recoil spring can push the idler at the wrong angle even when the idler itself is new. KTSU's catalog spans more than 3,000 undercarriage component items, and the practical lesson from that range is consistent: fitment decisions should be made from part numbers, serial ranges, and measured condition, not from visual similarity. If you need to match a replacement by OEM reference, the KTSU front idler range is organized by part number so the check can happen before the machine is lifted.
Torque, Alignment, and Re-Tensioning
Torque and alignment decide whether the new idler operates correctly. There is no universal torque for front idler hardware across Cat 320, Cat 330, Komatsu PC200, and PC300 machines; bolt grade, thread condition, and the tightening sequence are model-specific. Use the value in the current OEM service manual, and clean or chase threads before assembly so the clamp load is correct.
Check alignment before re-tensioning. The yoke should sit evenly in the frame rails, the idler should stand vertical to the chain path, and both flanges should clear the chain without binding. A subtle tilt that looks acceptable on the bench becomes a constant side load once the track is tight.
Re-tension the track by adding grease in short strokes through the adjuster fitting, measuring sag by the method in the manual rather than guessing. Travel the machine slowly forward and backward from the cab, then shut down and recheck sag, bolt condition, and the idler seal area. Repeat the inspection after the first working session and at the next scheduled maintenance interval. Proper manufacturing controls in component production only help when the mounting joint is clean, the hardware is torqued to spec, and alignment is verified before the track is tensioned.
Why a New Front Idler Can Still Fail Early
A new front idler can wear out quickly even when the part is correct, because the conditions that killed the old one are usually still in place. The replacement cannot fix a sagged recoil spring, worn slide rails, a bent yoke, packed abrasive debris, or a track that is adjusted too tight.
Common expectation gaps after front idler replacement:
A new idler will not correct a recoil spring that no longer holds the assembly forward
A visually similar part can still be wrong for the machine serial range
Reused or corroded hardware may not hold the required clamp load
Over-tight track adds continuous load to the idler, rollers, and sprocket
Under-tight track allows the chain to climb flanges and jump the sprocket
Replacing the part without measuring the mounting system can repeat the same failure
The repair that lasts comes from inspecting the whole running gear, not from swapping the most obvious component. If the machine traveled crooked before the replacement, the alignment problem should be found before the new idler is expected to fix it.
What has to be released and checked before the idler moves
An idler sits against a compressed recoil assembly. The order of the job is what makes it safe and what stops a new idler failing early.
| Step | Why it comes first | What it prevents |
|---|---|---|
| Release the track tension fully, following the manual procedure | The idler is under load from both the track and the recoil assembly | The track moving under load while it is not fully supported |
| Support the machine so the track frame is not carrying the weight | The frame and the recoil are loaded while the machine stands on them | Loads moving during the work, which is where the injuries and the frame damage come from |
| Check the recoil assembly before the new idler goes in | The idler is being put in front of a spring and cylinder that may not be holding | A new idler absorbing what the recoil should have taken |
| Inspect the seating faces and clean them | The new part has to seat on a surface that is sound and clean | An idler that does not sit square, and a machine that throws the track afterwards |
| Re-tension cold, on level ground, and check the alignment | The tension and the alignment together decide how the idler is loaded | Early flange wear on a new part |
The reason a new front idler fails early is usually found in the last two rows. The part was fitted to a machine whose recoil was tired, or whose seating and alignment were left as they were, and the new component is carrying the result.
Undercarriage Maintenance Perspective
Front idler failures are frequently tension-system issues disguised as component wear. Industry experience across Caterpillar, Komatsu, and Hitachi platforms indicates that while precision machining shapes the idler itself, the condition of the recoil housing largely dictates whether the replacement survives.
A precisely made idler fitted to a worn slide rail or a sagged spring still runs out of alignment. Standard maintenance practice involves measuring the yoke, rails, and spring before installation and comparing the new idler's flange position against the old one rather than assuming they match. Treated as an inspection event rather than a simple parts swap, front idler replacement becomes a more predictable procedure.
Frequently Asked Questions
How do I loosen the track tension before replacing a front idler?
Follow the manual procedure for releasing the grease or hydraulic adjuster, and confirm the tension is released before the track is disturbed. The idler is loaded by the track and by the recoil assembly at the same time.
Should the idler be replaced alone or with the recoil assembly?
The idler alone is normal where the recoil holds tension and the guide is sound. Where the recoil is not holding or the guide is worn, replacing the idler on its own puts a new part in front of the fault.
Why does a new front idler fail early?
Usually because of the machine it was fitted to: a recoil assembly that is not holding, seating faces that were not cleaned, or alignment left as it was. The new part is carrying the existing condition.
What should be checked after the idler is fitted?
Tension set cold and on level ground, the flange clearance, and the alignment. Then a short run followed by a re-check, because a part that seats differently under load will not show that on a static check.
References
This article is part of Excavator Idlers: Selection, Wear and Replacement, the guide that covers this topic in decision order.
More Undercarriage Parts guides
Find the next article for your component, application or buying decision.
Back to Undercarriage Parts