Yanmar SV100 Idler Tread Wear: When Is Re‑Shelling Enough and When Do You Replace the Whole Idler?
Inspection, wear evidence and replacement planning for the complete track system.
On this page
The turning point usually comes when the Yanmar SV100 starts “hunting” sideways on the undercarriage, the track feels nervous on the rollers, and you find yourself staring at a worn front idler wondering if a re-shell job will save money or just delay a bigger bill. You are not alone in trying to decide between rebuilding the idler tread with weld and machining or replacing the complete front idler assembly with new undercarriage repair parts. For a mid‑size excavator like the SV100, that decision has real consequences for track life, downtime, and long‑term undercarriage stability.
Last updated:

This article focuses on what actually happens at the tread and flange of an excavator idler, how a worn flange lets the chain ride high and walk sideways, and how to evaluate structural integrity after welding. We will stay close to real field conditions: mixed terrain, imperfect track tensioning, and machines that rarely see “ideal” maintenance. Along the way, you will see where re‑shelling makes financial and technical sense, where it becomes risky, and how manufacturers like KTSU think about hardness gradients, case depth, and service life when designing idlers for machines in the SV100 class.
What the Yanmar SV100 Front Idler Really Does
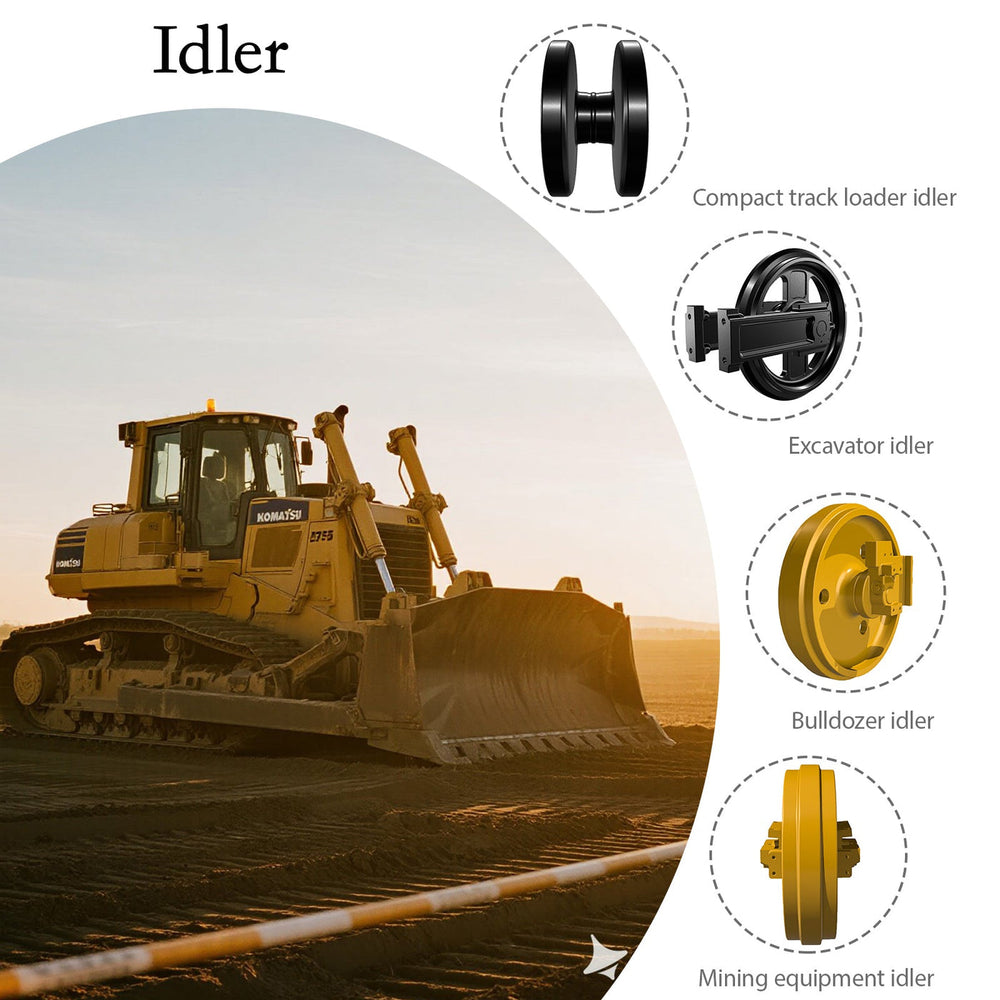
For the Yanmar SV100, the front idler is more than a dead wheel at the end of the frame; it guides the chain, sets track tension, and shapes how forces flow through the entire undercarriage. It carries horizontal loads from tracking and braking while guiding the links onto the rollers and sprocket in a predictable path. When the tread and flanges wear, that guidance weakens, and the track link can climb higher on the tread, changing contact geometry and stress.
In real work, the SV100 idler sees repeated shock from rocks, curb edges, and trench lips, plus continuous abrasion from fines and mud packed around the tread. Operators often adjust tension based on feel rather than spec, which means the idler sometimes runs over‑tight in clean conditions, or too slack in sticky clay. That variability is why two machines with similar hours can show completely different idler wear profiles. From an editorial perspective, treating the idler as a “simple wheel” is one of the most expensive undercarriage assumptions you can make on a 10‑ton excavator.
How Tread Wear and Flange Loss Change Track Behavior
Once tread wear goes beyond a cosmetic polish, it starts to alter the way the track link seats and carries load along the idler circumference. The hardened surface layer on an SV100‑size idler is designed to take rolling contact with the link rails while protecting a tougher, more ductile core underneath. As the tread thins, the contact patch widens and shifts, pushing more load closer to the flange and changing how the chain self‑centers. A pronounced hollow or step on the tread tells you that contact is no longer uniform; the chain is riding where the metal is weakest.
Flange wear creates a second, more subtle problem: once the flange loses height and profile, the track link has room to ride high and tilt laterally. That slight climb up the flange face lets the chain move sideways on the rollers, which shows up in the cab as a vague, wandering feel and more frequent side‑to‑side “nudging” corrections from the operator. In practice, this means the undercarriage can look fine at rest, yet behave unstable under load or when traveling across slopes. Experienced mechanics often read this behavior before they even put a tape measure on the idler.
Why a Worn Idler Flange Lets the Link Ride High and Go Sideways
When the flange is new, its height and angle act like shallow rails controlling how far the chain can move laterally as it passes over the idler. The link side faces contact the flange only briefly and gently, enough to keep the chain centered without carving into either surface. As flange thickness and height are lost, that rail becomes a short, rounded ridge. The link then has more lateral clearance and starts to climb the remaining flange instead of being quietly nudged back into line.
On a Yanmar SV100, that high riding link creates two practical effects. First, lateral tracking stability suffers: the track tends to drift left or right under travel, especially when pushing into a pile or working across cross‑slope. Second, the raised link shifts contact on the rollers and sprocket, concentrating wear on one side of the rail and tooth. From a real‑world standpoint, operators frequently blame “bad track chains” or “soft sprockets” when the root cause is actually flange loss on the idler that has quietly changed the way the whole chain sits on the undercarriage.
Re‑Shelling vs Full Replacement: How the Options Really Compare
When the tread is worn but the hub, bore, and internal structure are still sound, re‑shelling the idler by building up the tread with weld and machining it back to profile can look like a sensible cost control move. The logic is simple: keep the existing hub and bearings, restore outer geometry, and get more life out of an expensive component. For a contractor who tracks cost per hour closely, that approach can work—provided the welds, heat input, and hardness profile are controlled with the same discipline used in OEM manufacturing.
Complete idler replacement, on the other hand, resets the entire component: hub, shell, flanges, seals, and bearings. The upfront cost is higher, but the risk of hidden damage—cracked webs, softened case, heat‑affected bearing seats—is essentially removed. In real decisions, some owners switch to full replacement only after a welded idler fails prematurely, creating downtime that wipes out any earlier savings. The better approach is to compare like with like: weld procedure quality, hardness management, and remaining structural margin, not just the invoice total.
What “Material Hardness Gradient” Means After Welding the Tread
Every quality front idler, including those built for machines in the SV100 class, is designed with a hardness gradient: a hard, wear‑resistant outer layer transitioning into a tougher, more forgiving core. This gradient allows the tread to resist abrasion while the core absorbs impact and prevents brittle fracture. When you re‑shell an idler, you change that gradient locally. Weld deposit hardness, heat input, and cooling rate determine whether the new layer blends smoothly into the original case or creates a sharp, stressed boundary.
In practice, evaluating this after welding comes down to mapping hardness from the surface inward at several points around the circumference and through the flange region. A healthy post‑weld profile shows a controlled drop from the outer surface to the original core, without a sudden soft “dip” or extremely hard, brittle band at the fusion line. Shops that treat this as an occasional “check” rather than a standard process tend to see more random outcomes: some re‑shelled idlers run almost as long as new, others chip, crack, or dish out in a fraction of the time. From an engineering standpoint, the hardness gradient is the difference between a working repair and a cosmetic resurfacing.
When Re‑Shelling the Idler Makes Sense — and When It Does Not
Re‑shelling the SV100 front idler tends to make sense when several conditions line up: the hub is structurally sound, bore and bearing seats are within tolerance, cracks are absent or minimal, and the wear is mainly on the tread surface with moderate flange loss. In those cases, controlled weld build‑up and machining can restore the intended profile and keep the original internal structure working. This approach is most attractive for fleets running multiple similar machines, where consistent welding procedures and hardness checks can be standardized.
The repair becomes questionable when the flange is heavily consumed, radial cracks appear around the web, or previous repairs have already altered the hardness profile. In that scenario, adding more weld on top of unknown metallurgy may give a short‑term visual fix but not a reliable structural component. Real‑world experience shows that owners sometimes push one more re‑shell onto an already tired idler to hit a seasonal target, only to face an unplanned outage in the middle of the next job. Knowing where that line sits on your own machine is less about strict hour counts and more about honest inspection.
Why Good Idler Repairs Still Fail in Real Usage
Even a technically sound re‑shell job can underperform if it is dropped back into harsh service without changes to operation and maintenance. The SV100 undercarriage spends its life in varying soils—granite‑rich aggregates, silica sand, abrasive demolition rubble, or sticky clay that packs around the idler. If track tension remains habitually tight to “keep tracks on,” the restored tread sees higher contact stress than the original design assumed. That can accelerate wear or induce micro‑cracking at the weld interface, especially where hardness transitions are steep.
Another common failure pattern comes from operators switching between travel and spin turns aggressively, using the excavator almost like a skid steer in tight sites. That behavior amplifies lateral loads on the idler, which are precisely the forces a recently repaired flange is least happy to see. There is often a quiet expectation that a fresh weld and clean paint will behave like a factory‑new idler; the reality is more nuanced. A repaired component may require slightly gentler operating practices to reach similar life, especially across its first few hundred hours while surfaces bed in.
Re-shelling or replacing: the three gates
Re-shelling an idler returns the wear surface and leaves everything else as it was. Three gates decide whether the rest of the assembly is worth returning to service.
| Gate | What it establishes | What fails the gate |
|---|---|---|
| The shaft and its seat | That the new shell will be held where the design puts it | Scoring, fretting or measurable wear at the seat, which a new shell does not correct |
| The bearing and its bore | That the assembly will run with the clearance the seal needs | An out-of-round bore or a bearing surface that has already been contaminated |
| The sealing surfaces | That a new seal has a surface to run against | A groove, scoring or corrosion at the seal seat, which is the most common reason a resealed idler leaks again |
Two practical rules follow. Measure the three gates before the shell work is commissioned, because they are what the decision rests on and they are cheapest to check while the idler is still assembled on the machine. And verify the repair by measurement after fitting: shell diameter and flange profile against the specification, end play, and the sag reading, because a re-shelled idler is judged on the same figures as a new one.
The commercial argument is straightforward. Re-shelling is the cheaper route while the core is sound, and it stops being cheaper the moment a failed seal returns the idler to the workshop inside its new interval — at which point the fleet has paid for the shell and for the second repair.
How to Judge Structural Integrity and Track Stability After Repair
Once a re‑shelled idler goes back under a Yanmar SV100, the evaluation should not stop at visual inspection. Pay attention to three layers: geometry, hardness, and behavior in motion. Geometrically, measure tread diameter, flange height, and symmetry side‑to‑side; even small deviations can show up as tracking bias. From a hardness perspective, spot checks with a portable hardness tester across the tread and near the flange help confirm that the repair has not created soft spots or overly brittle bands that will later spall.
The final and often most honest test is how the machine tracks over a series of real‑world cycles: straight travel on firm ground, cross‑slope travel, and repeated turns under load. If the track “hunts” or walks sideways, if one side of the chain and roller set shows accelerated polish compared to the other, or if the operator needs frequent corrections to stay straight, those are signs that the idler is not guiding as designed—even if it looks good on stands. On the other hand, if tracking feels calm and consistent, it is a strong indication that structural integrity, profile, and hardness gradient are all working together.
KTSU Expert Views
From the vantage point of a manufacturer running a 70,000‑square‑meter facility focused on undercarriage components, KTSU tends to see the idler decision less as a single repair question and more as part of a system. The company’s exposure to more than 3,000 different undercarriage items, across brands like Caterpillar, Komatsu, Hitachi, and similar classes to the Yanmar SV100, means engineers watch how tread wear patterns correlate with track roller performance, sprocket tooth geometry, and link bushing condition. That broad data set changes how “one worn idler” is interpreted: not as an isolated failure, but as one node in a linked wear pattern.
On the technical side, KTSU’s use of NITTO friction welding, robotic CO₂ welding, and CNC machining reflects an emphasis on controlling case depth and hardness gradients from the start, not just hitting a surface hardness number. When re‑shelling is discussed, the question becomes: can the repair re‑establish a gradient and profile close to what those processes originally produced? The answer depends on weld procedure design, preheat, and post‑weld cooling more than on the brand of wire used.
Because KTSU works with distributors and fleets across different climates and soil conditions, its engineers also see how the same idler behaves on volcanic rock, river gravel, and reclaimed land. That experience supports a pragmatic view: re‑shelling can be a viable strategy for some fleets and terrains, particularly where inspection discipline is high, while full idler replacement suits operations that run harder cycles, mixed operators, and less predictable maintenance windows. In that sense, the “right” choice is less theoretical and more about aligning repair depth with how the machine is really used day to day.
Frequently Asked Questions
When is re-shelling an idler enough?
While the shaft and its seat are within tolerance, the bearing bore is round and sound, and the sealing surfaces are intact. Those three conditions are what the decision rests on rather than the amount of tread wear alone.
What fails the decision to re-shell?
A scored or worn shaft seat, an out-of-round or contaminated bearing bore, and a damaged seal seat. Any of those means the assembly goes back into service with the defect that would cause the next failure.
How do I verify a re-shelled idler?
Measure the shell diameter and flange profile against the specification, check end play along the shaft, and confirm the sag reading after fitting. A repaired idler is judged on the same figures as a new one.
Why do resealed idlers leak again?
Usually because the surface the seal runs against was already damaged, or because the assembly was damaged during the repair. The seal is not the only part of a sealing system.
How long should an idler last after repair?
It should reach the same band as a new one for the duty, which the tables used across this site put at roughly 6,000-9,000 hours in earthworks and 3,500-6,000 in mining. A repaired idler that comes off well inside that band was rebuilt on a core that should have been replaced.
References
XMGTECH — How to Extend the Life of Your Excavator Carrier Rollers and Idlers
Yutani Global — Excavator Undercarriage Lifetime Affect Factors
Racer Machinery — Analysis of Excavator Undercarriage Malfunctions
DOZCO — Extending the Life of Excavator Undercarriage Parts in Harsh Conditions
Kyotechs — How to Maintain and Care for Your Excavator’s Undercarriage
Langley Excavator Parts — Undercarriage Problems, Maintenance & Repair
Pro Construction Parts — Common Excavator Undercarriage Wear Issues
Origin Machinery — Common Causes of Wear in Excavator Undercarriages and Prevention Methods
This article is part of Excavator Idlers: Selection, Wear and Replacement, the guide that covers this topic in decision order.
More Maintenance & Wear guides
Find the next article for your component, application or buying decision.
Back to Maintenance & Wear